비동기 작업을 처리하는 미들웨어 사용
미들웨어는 여러가지 종류가 있다.
- redux-thunk: 비동기 작업을 처리할때 가장 많이 사용. 객체가 아닌 함수형태의 액션을 디스패치 할 수 있게 해준다.
- redux-saga: redux-thunk 다음으로 많이 사용되는 비동기작업관련 미들웨어 라이브러리. 특정액션이 디스패치 되었을때 정해진 로직에 따라 다른 액션을 디스패치시키는 규칙을 작성하여 비동기 작업을 처리할 수 있게 해준다.
redux-thunk
Thunk란 특정 작업을 나중에 할 수 있도록 미루기 위해 함수형태로 감싼것 의미.
redux-thunk를 사용하면 thunk함수를 만들어서 디스패치 할 수 있다. 그러면 리덕스 미들웨어가 그 함수를 전달 받아 store의 dispatch와 getState를 파라미터로 넣어서 호출해준다.
$ npm install redux-thunk
import { createLogger } from 'redux-logger';
// import ReduxThunk from 'redux-thunk'; // -> 안됨
import { thunk } from 'redux-thunk';

const logger = createLogger();
const store = createStore(rootReducer, applyMiddleware(logger, thunk));
Thunk 생성함수
redux-thunk는 액션 생성 함수에서 일반 액션 객체를 반환하는 대신에 함수를 반환한다.
counter.js
// Thunk 생성 함수
export const increaseAsync = () => dispatch => {
  setTimeout(() => {
    dispatch(increase())
  }, 1000)
};
export const decreaseAsync = () => dispatch => {
  setTimeout(() => {
    dispatch(decrease())
  }, 1000)
}CounterContainer.jsx에서 적용
import React from 'react'
import Counter from '../components/Counter'
import { connect } from 'react-redux'
import { increaseAsync, decreaseAsync } from "../modules/counter";
const CounterContainer = ({ number, increaseAsync, decreaseAsync }) => {
  return (
    <Counter
      number={number}
      onIncrease={increaseAsync}
      onDecrease={decreaseAsync}
    />
  );
};

export default connect(
    state => ({
        number: state.counter
    }),
    {
        increaseAsync,
        decreaseAsync,
    }
)(CounterContainer);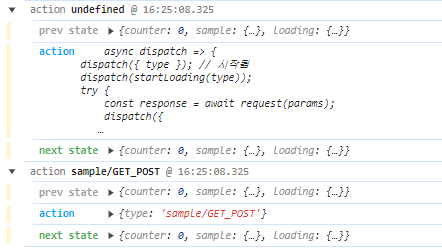
처음 디스패치되는 액션은 함수형태이고, 두번째 액션은 객체형태이다.
웹 요청 비동기작업 처리
가짜 API를 이용하여 비동기작업을 처리하는 방법에 대해 알아볼것이다.
- 포스트 읽기
- 모든 사용자 정보 불러오기
API를 호출할때는 주로 Promise 기반 웹 클라이언트인 axios를 사용한다.$ npm install axios
API를 모두 함수화하여 작성한다.
API를 호출하는 함수를 따로 작성하면, 나중에 사용할때 가독성도 좋고 유지보수도 쉬워진다.lib/api.js
import axios from 'axios'

const url = 'https://jsonplaceholder.typicode.com';
export const getPost = id =>
    axios.get(url + `/posts/${id}`);

export const getUsers = id =>
    axios.get(url+`/users`);
modules/sample.js
// 반복코드 로직 분리 후 (createRequestThunk 사용)
import { handleActions } from "redux-actions";
import * as api from "../lib/api";
import createRequestThunk from "../lib/createRequestThunk";


const GET_POST = "sample/GET_POST";
const GET_POST_SUCCESS = "sample/GET_POST_SUCCESS";
const GET_POST_FAILURE = "sample/GET_POST_FAILURE";

const GET_USERS = "sample/GET_USERS";
const GET_USERS_SUCCESS = "sample/GET_USERS_SUCCESS";
const GET_USERS_FAILURE = "sample/GET_USERS_FAILURE";

// thunk 함수생성

export const getPost = createRequestThunk(GET_POST, api.getPost);
export const getUsers = createRequestThunk(GET_USERS, api.getUsers);


// 초기상태 선언
// 요청의 로딩 중 상태는 loading이라는 객체에서 관리

const initialState = {
  post: null,
  users: null,
};

const sample = handleActions(
  {
    [GET_POST_SUCCESS]: (state, action) => ({
      ...state,
      post: action.payload,
    }),
    [GET_USERS_SUCCESS]: (state, action) => ({
      ...state,
      users: action.payload,
    }),
  },
  initialState
);

export default sample;
액션 디스패치, 로딩제어를 리듀서에서 하는게 아니라 미들웨어에서 하고있어서 리듀서 코드가 간결해졌다. 리듀서에서 로딩부분을 삭제해서 실패상태, 기본상태에 대한 코드가 필요 없어졌다.
성공했을때의 케이스만 잘 보여주면 된다.
추가로 실패했을때 케이스를 관리하고싶다면 _FAILURE가 붙은 액션을 리듀서에서 처리해주면된다.
혹은 컨테이너 컴포넌트에서 try/catch구문을 사용하여 에러값을 조회할 수 있다.
lib/createRequestThunk.js
//  thunk함수 반복코드 로직분리

import { startLoading, finishLoading } from "../modules/loading";

export default function createRequestThunk(type, request) {
    // 성공, 실패 액션 타입을 정의한다.
    const SUCCESS = `${type}_SUCCESS`;
    const FAILURE = `${type}_FAILURE`;
    console.log(type, request)

    return params => async dispatch => {
        dispatch({ type }); // 시작됨
        dispatch(startLoading(type));
        try {
            const response = await request(params);
            dispatch({
                type: SUCCESS,
                payload: response.data
            }); // 성공
            dispatch(finishLoading(type));
        } catch(e) {
            dispatch({
                type: FAILURE,
                payload: e,
                error: true
            }); // 에러발생
            dispatch(startLoading(type))
            throw e;
        }
    }
}

// 사용법: createRequestThunk('GET_USERS', api.getUsers);
modules/loading.js
import { createAction, handleActions } from 'redux-actions';

const START_LOADING = 'loading/START_LOADING';
const FINISH_LOADING = 'loading/FINISH_LOADING';

export const startLoading = createAction(
    START_LOADING,
    requestType => requestType
);

export const finishLoading = createAction(
    FINISH_LOADING,
    requestType => requestType
);

const initialState = {};

const loading = handleActions(
    {
        [START_LOADING]: (state, action) => ({
            ...state,
            [action.payload]: true
        }),
        [FINISH_LOADING]: (state, action) => ({
            ...state,
            [action.payload]: false
        })
    },
    initialState
)

export default loading;
thunk 함수가 반복되는데 이 로직을 분리하여 createRequestThunk.js 함수를 작성했다.
loading의 상태도 따로 떼서 관리한다.
루트리듀서에 sample과 loading 등록modules/index.js
import { combineReducers } from 'redux';
import counter from './counter';
import sample from './sample';
import loading from "./loading";

const rootReducer = combineReducers({
    counter,
    sample,
    loading
});

export default rootReducer;
components/Sample.jsx
import React from 'react'

const Sample = ({ loadingPost, loadingUsers, post, users }) => {

  return (
    <div>
        <section>
            <h1>포스트</h1>
            {loadingPost && '로딩중... '}
            {!loadingPost && post && (
                <div>
                    <h3>{post.title}</h3>
                    <h3>{post.body}</h3>
                </div>
            )}
        </section>
        <hr />
        <section>
            <h1>사용자목록</h1>
            {loadingUsers && '로딩중...'}
            {!loadingUsers && users && (
                <ul>
                    {users.map(user => (
                        <li key={user.id}>
                            {user.username} ({user.email})
                        </li>
                    ))}
                </ul>
            )}
        </section>
    </div>
  )
}

export default Sample
containers/SampleContainer.jsx
import React from 'react'
import { useEffect } from 'react'
import Sample from '../components/Sample';
import { connect } from 'react-redux';
import { getPost, getUsers } from '../modules/sample';

const SampleContainer = ({
    getPost,
    getUsers,
    post,
    users,
    loadingPost,
    loadingUsers
}) => {
    useEffect(() => {
      const fn = async() => {
        try {
          getPost(1);
          getUsers(1);
        } catch (e) {
          console.log(e);
        }
      }
      fn();
      // useEffect 파라미터로 넘는 함수는 async를 할 수 없어서
      // 내부에서 함수를 선언하고 호출해준다.
    }, [getPost, getUsers])

  return (
    <Sample
        post={post}
        users={users}
        loadingPost={loadingPost}
        loadingUsers={loadingUsers}
    />
  )
}

export default connect(
    ({ sample, loading }) => ({
        post: sample.post,
        users: sample.users,
        // loadingPost: sample.loadingPost,
        // loadingUsers: sample.loadingUsers
        loadingPost: loading['sample/GET_POST'],
        loadingUsers: loading['sample/GET_USERS']
    }),
    {
        getPost,
        getUsers
    }
)(SampleContainer)
redux-thunk를 처음 쓸때는 작성해야할 코드가 많아서 불편할 수 있지만, 유용한 함수와 리듀서를 만들어서 상태를 관리한다면 매우 깔끔한 코드로 기능을 구현할 수 있다.
'Frontend > React' 카테고리의 다른 글
| [React] 코드 스플리팅(React.lazy와 Suspense, 그리고 Loadable Components) (1) | 2024.01.10 |
|---|---|
| [React] 리액트 미들웨어 redux-saga (1) | 2023.12.28 |
| [React] 리액트 미들웨어란? (0) | 2023.12.28 |
| [Redux] 리덕스를 사용하여 상태 관리 (0) | 2023.12.28 |
| [React] Context API (0) | 2023.12.28 |


