## 08. API를 통해 포켓몬 데이터 가져오기
### Axios란 무엇인가?
* Axios는 브라우저, Node.js를 위한 Promise API를 활용하는 HTTP 비동기 통신 라이브러리이다.
* 쉽게 말해서 백엔드랑 프론트엔드랑 통신을 쉽게 하기위해 Ajax와 더불어 사용한다.
Client <- Axios -> Poke API 서버
(fetch()) (fetch => response => json)
### Axios 사용방법
* axios 모듈설치 `npm i axios`
```js
const [pokemons, setPokemons] = useState([]);
const url = 'https://pokeapi.co/api/v2/pokemon/?limit=100&offset=0';
useEffect(() => {
fetchPokeData();
}, []);
const fetchPokeData = async () => {
try {
const data = await axios.get(url);
console.log(data)
} catch (error) {
console.error(error)
}
}
```
useEffect안에서 API요청 -> response -> state update -> component rerender => 변화된 state UI에서 보여줌 (`[]`에 따라서)
### 포켓몬 데이터를 보여줄 UI생성
```js
return (
<article className="pt-6">
<header className="flex flex-col gap-2 w-full px-4 z-50">
</header>
<section className="pt-6 flex flex-col justify-content items-center overflow-auto z-0">
{pokemons.length > 0 ? (
pokemons.map((pokemon, index) => (
<div key={index} pokemon={pokemon}>{pokemon.name}</div>
))
): (
<h2 className="font-medium text-lg text-slate-900 mb-1">
포켓몬이 없습니다.
</h2>
)}
</section>
</article>
);
```
hover시 클래스에 걸린 css가 뭔지 보이는 플러그인이 궁금하다...

Tailwind preview일듯 추측하고있음
## 09. 포켓몬 카드 생성하기
components > `PokeCard.jsx`
```js
import React, { useEffect, useState } from "react";
import axios from "axios";
const PokeCard = ({ url, name }) => {
const [pokemon, setPokemon] = useState();
useEffect(() => {
fetchPokeDetailData();
}, []);
const fetchPokeDetailData = async () => {
try {
const response = await axios.get(url);
console.log(response.data);
const pokemonData = formatPokeData(response.data);
setPokemon(pokemonData);
} catch (error) {
console.error(error);
}
};
const formatPokeData = (params) => {
const { id, types, name } = params;
const PokeData = {
id,
name,
type: types[0].type.name,
};
// setPokemon(PokeData);
return PokeData;
};
return <div>test</div>;
};
export default PokeCard;
```
## 10. 포켓몬 카드 UI 생성하기
### color theme 지정
`tailwind.config.cjs`에서 컬러테마를 지정한다.
```js
module.exports = {
content: [
"./src/**/*.{js,jsx,ts,tsx}",
"./index.html",
"./src/styles/main.css",
],
theme: {
extend: {
colors: {
primary: "#ffcb05",
second: "#3d7dca",
third: "#003a70",
normal: "#A8A77A",
fire: "#EE8130",
water: "#6390F0",
electric: "#dfbc30",
grass: "#7AC74C",
ice: "#97d4d2",
fighting: "#b83e3a",
poison: "#A33EA1",
ground: "#E2BF65",
flying: "#A98FF3",
psychic: "#F95587",
bug: "#A6B91A",
rock: "#B6A136",
ghost: "#735797",
dragon: "#6F35FC",
dark: "#705746",
steel: "#B7B7CE",
fairy: "#D685AD",
none: "#BfBfBf",
},
},
},
plugins: [],
};
```
사용할때 바로 라이브서버에서 안나오는데 이때
```js
<div className="text-normal bg-normal "></div>
<div className="text-fire bg-fire "></div>
<div className="text-water bg-water "></div>
<div className="text-electric bg-electric "></div>
<div className="text-grass bg-grass "></div>
<div className="text-ice bg-ice "></div>
<div className="text-fighting bg-fighting "></div>
<div className="text-poison bg-poison "></div>
<div className="text-ground bg-ground "></div>
<div className="text-flying bg-flying "></div>
<div className="text-psychic bg-psychic "></div>
<div className="text-bug bg-bug "></div>
<div className="text-rock bg-rock "></div>
<div className="text-ghost bg-ghost "></div>
<div className="text-dragon bg-dragon "></div>
<div className="text-dark bg-dark "></div>
<div className="text-steel bg-steel "></div>
<div className="text-fairy bg-fairy"></div>
<div className="text-none bg-none"></div>
```
이부분을 리턴에 한번 넣어주고 저장한다음 삭제하면 보이게된다.
### UI 작성
```js
const bg = `bg-${pokemon?.type}`;
const border = `border-${pokemon?.type}`;
const text = `text-${pokemon?.type}`;
const img = `https://raw.githubusercontent.com/PokeAPI/sprites/master/sprites/pokemon/other/official-artwork/${pokemon?.id}.png`;
return (
<>
{pokemon && (
<a
href={`/pokemon/${name}`}
className={`box-border rounded-lg ${border} w-[8.5rem] h-[8.5rem] z-0 bg-slate-800 justify-content`}
>
<div
className={`${text} h-[1.5rem] text-xs w-full pt-1 px-2 text-right rounded-t-lg`}
>
#{pokemon.id.toString().padStart(3, "00")}
</div>
<div className={`w-full f-6 items-center justify-center`}>
<div
className={`box-border relative flex w-full h-[5.5rem] basis justify-center items-center`}
>
<img
src={img}
alt={pokemon.name}
width="100%"
className={`object-contain h-full`}
/>
</div>
<div
className={`${bg} text-xs text-zinc-100 h-[1.5rem] rounded-b-lg uppercase font-medium pt-1`}
>
{pokemon.name}
</div>
</div>
</a>
)}
</>
);
```
## 11. Image Lazy Loading
### Image Lazy Loading이란?
lazy란 게으른, 가능한 길게 일을 미루는 행위를 의미한다.
그래서 Image Lazy Loading은 페이지안에 있는 실제 이미지들을 바로 보여주는게 아닌
실제로 화면에 보일 필요가 있을때 로딩을 할 수 있도록 하는 테크닉이다.
### Image Lazy Loading 구현방법
1. javascript 이벤트를 이용한 구현
2. Intersection Observer API 이용한 구현
3. 브라우저 Native Lazy Loading 이용 => **loading 속성 이용**
### Image 컴포넌트 따로 만들기
PokeCard.jsx에서 이미지부분을 컴포넌트로 사용한다.
`<LazyImage src={img} alt={name} />`
그리고 LazyImage 컴포넌트 작성한다.
```js
import React, { useEffect, useState } from "react";
const LazyImage = ({ src, alt }) => {
const [isLoading, setIsLoading] = useState(true);
const [opacity, setOpacity] = useState('opacity-0');
useEffect(() => {
isLoading ? setOpacity("opacity-0") : setOpacity("opacity-100");
}, [isLoading]);
return (
<>
{isLoading && (
<div className="absolute h-full z-10 w-full flex items-center justify-center">
...loading
</div>
)}
<img
src={src}
alt={alt}
width="100%"
height="auto"
loading="lazy"
onLoad={() => setIsLoading(false)}
className={`object-contain h-full ${opacity}`}
/>
</>
);
};
export default LazyImage;
```
## 12. 포켓몬 카드 더보기 기능 생성하기
### 필요한 state생성
```js
const [offset, setOffset] = useState(0)
const [limit, setLimit] = useState(20)
```
offset은 시작하는 위치이고
limit은 몇개씩 가져오는지 이다.
리스트 페이지에서 fetch하던부분 url을
`'https://pokeapi.co/api/v2/pokemon/?limit=10&offset=0'`에서 offset과 limit을 사용해주면 되겠다.
### 더보기 기능
App.jsx에서(전체리스트)
```js
useEffect(() => {
fetchPokeData(true);
}, []);
const fetchPokeData = async (isFirtstFetch) => {
try {
const offsetValue = isFirtstFetch ? 0 : offset + limit;
const url = `https://pokeapi.co/api/v2/pokemon/?limit=${limit}&offset=${offsetValue}`;
const response = await axios.get(url);
setPokemons([...pokemons, ...response.data.results]);
setOffset(offsetValue)
} catch (error) {
console.error(error)
}
}
return (
...
<div className="text-center">
<button
onClick={() => fetchPokeData(false)}
className="bg-slate-800 px-6 py-2 my-4 text-base rounded-lg font-bold text-white"
>
더 보기
</button>
</div>
...
)
```
## 13. 검색 기능 생성하기
### state
`const [searchTerm, setSearchTerm] = useState('');`
### UI
```js
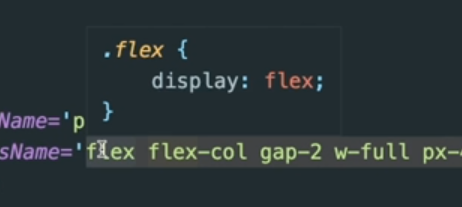
<header className="flex flex-col gap-2 w-full px-4 z-50">
<div className="relative z-50">
<form
action=""
className="relative flex justify-center items-center w-[20.5rem] h-6 rounded-lg m-auto"
>
<input
type="text"
onChange={handleSearchInput}
value={searchTerm}
className="text-xs w-[20.5rem] h-6 px-2 py-1 bg-[hsl(214,13%,47%)] rounded-lg text-gray-300 text-center"
/>
<button type="submit" className='text-xs bg-slate-900 text-slate-300 w-[2.5rem] h-6 px-2 py-1 rounded-r-lg text-center absolute right-0 hover:bg-slate-700'>검색</button>
</form>
</div>
</header>
```
### handleSearchInput
```js
const handleSearchInput = async (e) => {
setSearchTerm(e.target.value)
if(e.target.value.length > 0) {
try {
const response = await axios.get(`https://pokeapi.co/api/v2/pokemon/${e.target.value}`)
const pokemonData = {
url: `https://pokeapi.co/api/v2/pokemon/${response.data.id}`,
name: searchTerm,
};
setPokemons([pokemonData])
} catch(error) {
setPokemons([]);
// console.error(error)
}
} else {
fetchPokeData(true);
}
}
```
## 14. useDebounce Custom Hooks 만들기
### Debounce란?
검색할때 입력할때마다 결과가 바로 적용되지 않고 지연을 만든다.
사용자가 미리 결정된 시간동안 타이핑을 멈출때까지 keyup이벤트의 처리를 지연시킨다.
이렇게 하면 UI코드가 모든 이벤트를 처리할 필요가 없고 서버로 전송되는 API호출 수도 크게 줄어든다. 입력된 모든 문자를 처리하면 성능이 저하되고 백엔드에 불필요한 로드가 추가될 수 있다.
### useDebounce hook
```js
import React, { useEffect, useState } from 'react'
export const useDebounce = (value, delay) => {
const [deboucedValue, setDebouncedValue] = useState(value);
useEffect(() => {
const handler = setTimeout(() => {
setDebouncedValue(value)
}, delay)
return () => {
clearTimeout(handler)
}
}, [value, delay])
return deboucedValue;
}
```
'Frontend > React' 카테고리의 다른 글
| [React] 포켓몬도감 만들기4 (0) | 2023.12.08 |
|---|---|
| [React] 포켓몬도감 만들기3 (1) | 2023.12.08 |
| [React] 포켓몬도감 만들기1 (1) | 2023.12.08 |
| [emotion] 이모션을 styled-component처럼 사용하기(@emotion/styled) (0) | 2023.09.05 |
| [React] React Component Styling (0) | 2023.08.25 |


